
Free Crochet Crocs Keychain Pattern: Stitch Your Own Mini Clogs
Hey there, craft lovers! If you’ve been anywhere on social media lately, you already know that miniature versions of everyday items are having a massive moment. Today, we are tackling one of the most fun, quirky, and viral accessories out there: a free crochet crocs keychain pattern!
Just like the real-life clogs we all know and love, this mini crochet shoe features the iconic toe holes, a chunky textured sole, and even a tiny movable heel strap secured with crochet rivets. It is the absolute perfect size to hold your keys, clip onto a backpack, or gift to that one friend who refuses to wear any other footwear. Best of all, it takes less than an hour to complete and uses up those tiny scraps of yarn you’ve been hoarding.
Pick your favorite bright color (yellow is a fantastic classic choice, as seen in image_f8d0b3.jpg!), and let’s jump right into the stitches!

Materials Needed
Because this is a miniature project, you won’t need much to get started. You can use standard acrylic or cotton yarn—cotton will give the shoe a bit more crisp structure to show off those holes!
- Yarn: Using 4-ply yarn – You can check out Catania yarn
- Crochet Hook: 2.0mm hook – You can check out Tulip crochet hooks
- Keychain Ring & Chain: To turn your finished miniature clog into a fully functional accessory.
- Scissors & Tapestry Needle: For fastening off and weaving in your loose yarn ends.
- Optional Glue/Stitch Marker: Helpful for reinforcing the sole and tracking your progress.
Video Tutorial: Crochet Crocs Keychain Tutorial
You can follow along with my YouTube video to crochet crocs keychain tutorial! I have timestamps included to section the video and help you jump to any point you need to!
Abbreviations (US Terms)
This pattern is written using United States crochet terminology. Keep an eye out for the double crochet increase, which helps create the smooth curves of the shoe’s sole!
- ch: Chain
- sc: Single crochet
- hdc: Half double crochet
- dc: Double crochet
- dc inc: Double crochet increase (work 2 double crochets into the same stitch)
- sk: Skip
- BLO: Back Loop Only
- MR: Magic Ring
- Rnd: Round

Step-by-Step Instructions
This project is broken down into four quick segments: the ventilated upper toe section, a double-layered thick sole, the heel strap, and the tiny side rivets to put it all together.
Crocs Upper (Hole Section)
This part creates the top of the clog where the signature “breathing holes” go. It is worked in flat rows, meaning you will turn your work at the end of each row.
- Row 1: Ch 12. Starting from the 3rd chain from your hook: 1 hdc, ch 2, sk 2, 1 hdc, ch 2, sk 2, 1 hdc, ch 2, sk 2, 1 hdc.
- Row 2: Work 10 sc across.
- Row 3: 1 hdc, ch 2, sk 2, 1 hdc, ch 2, sk 2, 1 hdc, ch 2, sk 2, 1 hdc, ch 2, sk 2, 1 hdc.
- Row 4: Work 10 sc across.
- Row 5: ch 3, 2 hdc, ch 3.
- Row 6: 3 sc, 2 sc, 3 sc.
- Row 7: Crochet 1 round of single crochet evenly around the entire perimeter of the piece to give it a neat, clean border. Fasten off.
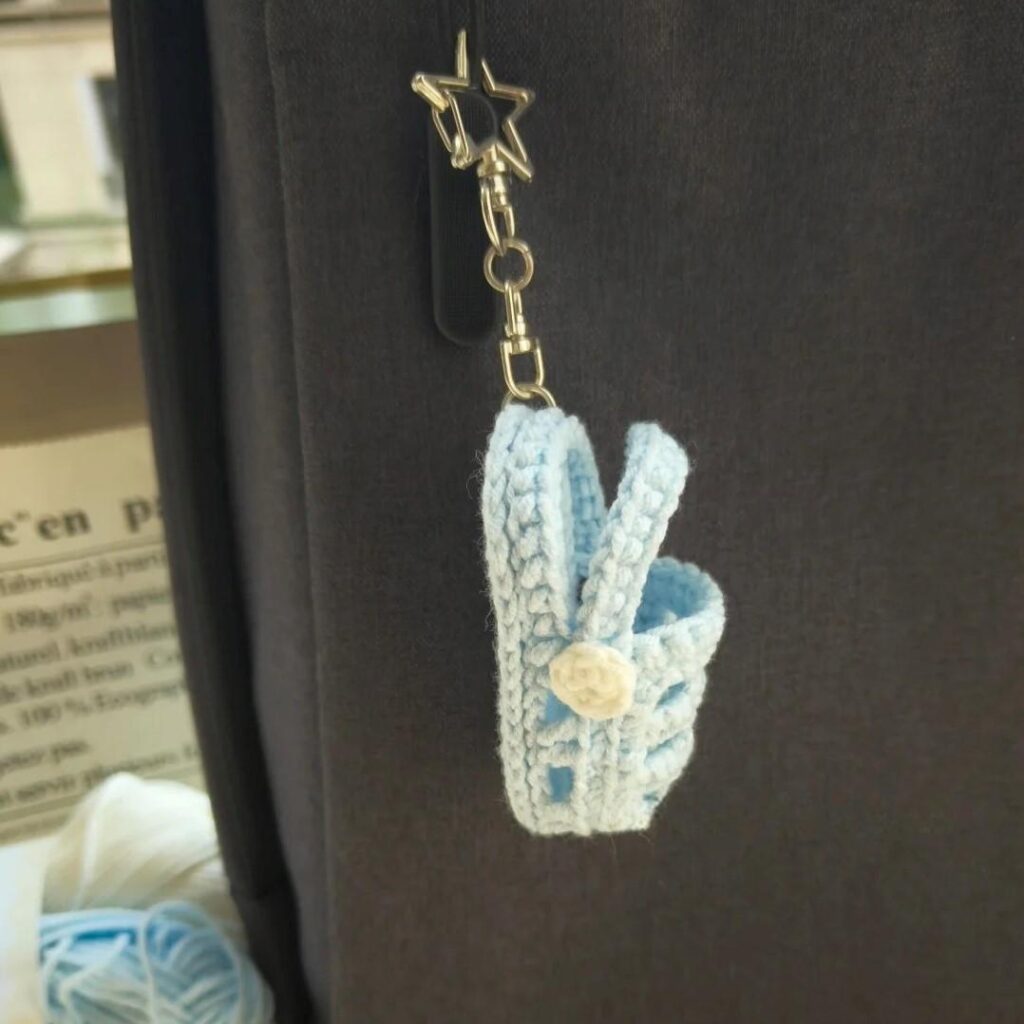
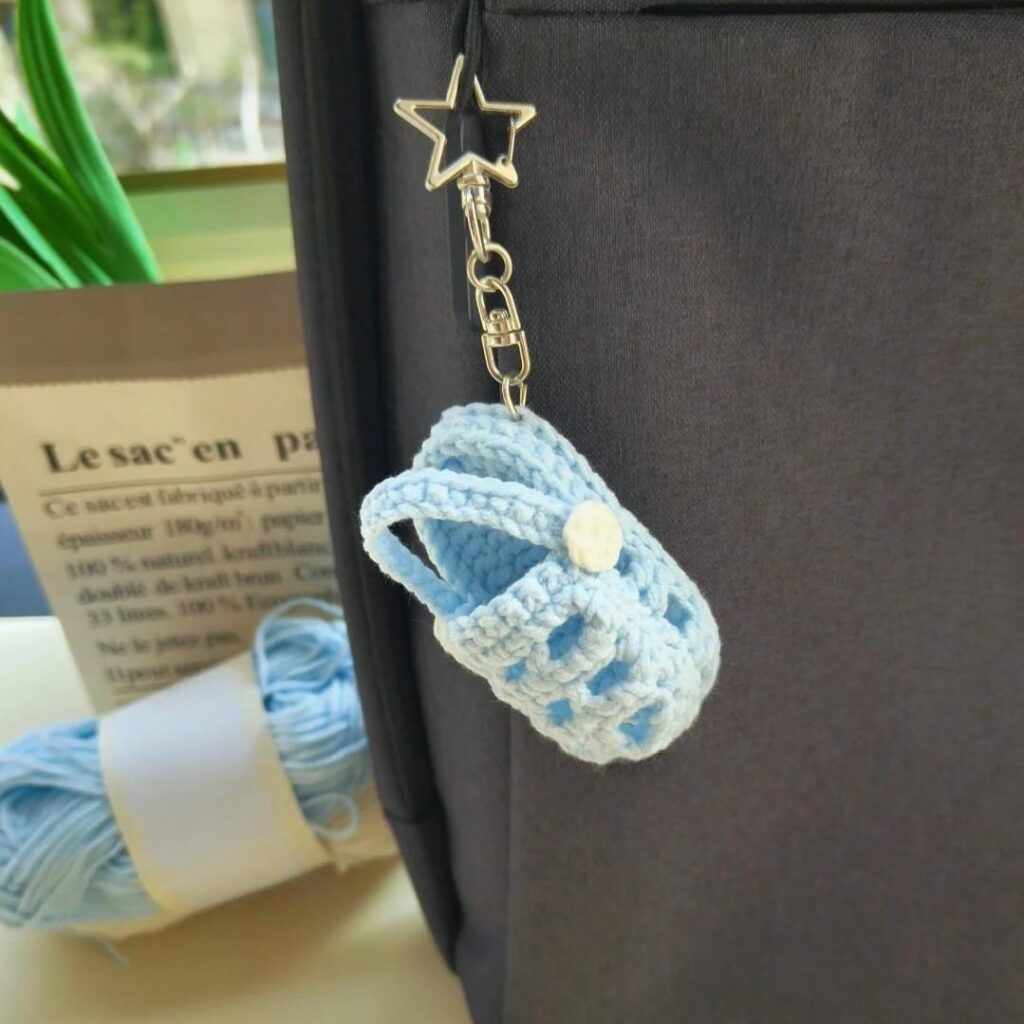
Shoe Sole
To make this little shoe sturdy enough to survive being tossed around on a set of keys, we are going to create a thick, double-layered base.
💡 Important Construction Note: You will need to crochet 2 identical sole pieces using the instructions below. Once both are finished, you will stack them together and either join them with stitches or use a bit of fabric glue to fuse them into one sturdy sole. Do not cut or fasten off the yarn on your second piece!
- Rnd 1: Ch 13. Starting in the 3rd chain from your hook, work: 3 dc all in that same initial chain, then 9 dc down the line, and 6 dc in the very last chain space to round the corner cleanly. Working along the opposite side of your foundation chain loop: 9 dc, and finish with 3 dc in the same chain as your very first stitches.
- Rnd 2: 3 dc inc, 9 dc, 6 dc inc, 9 dc, 3 dc inc.
(Now, stack your two soles together and join them. Keep your yarn attached to continue directly into the side walls of the shoe!)
- Rnd 3 (Shoe Wall): Working in BLO (Back Loop Only) to create a crisp edge: ch 2, 1 hdc, ch 2, sk 2, 2 hdc, ch 2, sk 2, 2 hdc, ch 2, sk 2, 1 hdc, 18 sc, 1 hdc, ch 2, sk 2, 2 hdc, ch 2, sk 2, 2 hdc, ch 2, sk 2. Fasten off.
Shoe Strap
Every good clog needs its security strap so you can put it into “sport mode”!
- Row 1: Ch 19. Starting from the 2nd chain from your hook, work 18 sc across. Fasten off, leaving a tail.
Buttons / Rivets (Make 2)
These act as the little black side-snaps that hold the strap to the sides of the shoe walls. Black yarn works perfectly here to emulate the real look from image_f8d0b3.jpg.
- Rnd 1: Work 6 sc into a MR. Fasten off.
Assembly & Finishing Touches
With all your tiny pieces laid out, it’s time to construct your mini shoe:
- Attach the Upper Portion: Take your finished Upper Hole Section and align it over the front toe area of the Shoe Wall. Sew the edges together securely using your yarn needle so the front of the clog is enclosed.
- Attach the Strap: Position the ends of your Shoe Strap on either side of the shoe’s ankle collar.
- Secure with Rivets: Place one tiny round rivet button over each end of the strap where it meets the shoe wall, and stitch through all layers to secure the strap in place.
- Add Your Keyring: Attach your metal keychain ring or clip straight through the back heel portion of the shoe wall or strap.
Final Thoughts
And there you have it! Your incredibly trendy, pocket-sized shoe is officially complete. Isn’t this free crochet crocs keychain pattern an absolute blast to put together?
The cool part about this design is how easy it is to customize. You can make them in neon shades, add tiny embroidered accents to mimic shoe charms (Jibbitz!), or even make mismatched pairs for a fun flair. They make wonderful stocking stuffers, craft fair bestsellers, or quick weekend projects.
If you loved making this mini clog, leave a comment below and let me know what color you chose! Don’t forget to share your photos with the community. Happy making!
Recommend for you: Free Crochet Miffy Pattern | Easy Amigurumi Tutorial
